My history with growing chillies has been a lazy gardener one. My mother gave me a plant when I first moved into my own house and it seemed to survive not being watered, looking like the dead then reviving in spring with minimal care. In fact, after too much minimal care the poor plant did move on to plant heaven.
My next lot of chillies drowned when I left them at my sister's house to be looked after when I was on holiday. They could not be resuscitated - I suspect the roots rotted or grew fungus.
Then I had a gift of two chillies from hubby's secretary. They were in pretty ornamental pots with no drainage and they too suffered from drowning. However, I took them out and dried them off, and they looked very miserable and sad and I thought they were lost. However, in the spring a few leaves began to show and they came back to life, only to be brought to the brink of death once again when I transplanted them to the side of the fence hoping they would never suffer from being drowned again, but the gardener thought they were weeds and beheaded them with the whipper snipper just 10cm above their base. Amazingly, they grew back with a vengeance and were tall and flowering!
However, they had a near brush with death again.
Hubby was setting up some irrigation and doing some digging and one of the chilli plants "fell over". I'm not sure HOW that happened, but here I was with an uprooted 40cm tall plant who had been lying in the hot sun all afternoon. It looked very sad. I quickly planted it in a separate spot and heavily watered it and fortunately it seems to have taken. There was a notable paucity of lengthy roots which tends to make me think the plant was yanked out rather than "fell over". Anyway, it's still going.
In between all these traumatic chilli events, I had been given some Trinidad Scorpion seeds and Scotch Bonnet seeds by my sister who was hoping we could grow them. I was unable to germinate them, and I even bought another batch of chilli seeds hoping to try again, but remained unsuccessful. I think I'm not keeping the seeds hot enough - they need to be about 28 degrees Celsius to germinate.
So I decided to try and BUY a fully grown plant so I could get my chillies, and found one on Gumtree - except this was a full on BUSH, not a little 20cm plant.
It was difficult to transport and I was using a friend's car, and we had to put the plant sideways to get it into the car and of course all the soil and water tipped out into the carpeted boot, much to my friend's dismay. His poor brand new car...
I also ended up with a bunch of freebies. I got some Habaneros and some Jalapenos and they more than made up for my poor uprooted plant. So now I have 8 extra chilli plants! The seller was pleased to see that the chillies were going to a good caring home (how could he tell that by looking at me!) and wanted me to take some more of his chillies or they would be destroyed as he was moving interstate. He also told me that the chilli likes to be kept moist but not flooded. There was one fruit on the bush, and a number of flowers too. So it looks like I'll be able to harvest a few super hot chillies in the next month or so.
My sister is excited that I have a plant and is looking forward to getting some chillies. If I have too many I might have to look at making my own chilli sauce!
Showing posts with label gardening. Show all posts
Tuesday, 5 April 2016
Sunday, 27 March 2016
Recycling Infant Formula tins and reusing vegetable "castoffs"
My sister had a pyramid of formula tins at her house and I told her to fill them up with kitchen food waste and I'd put it into my compost. I ended up with a whole lot of tins, and she ended up with a lot less junk in her house.
My mother told me that her sister (my aunt) would get old tins and use them as planters. Her whole garden was filled with them, so I thought I'd give it a try.
First you have to drill drainage holes in the bottom. I didn't have a drill at the time but I used a hammer and nail to make holes. But now we have a drill and I drill the holes.
Then I put a small layer of dry leaves and some shredded newspaper at the bottom, so that I wouldn't have so much dirt falling out the holes.
I filled it up with potting mix and depending on whether I had any worm castings, I'd add that when the container was about 3/4 full. Otherwise I'd mix in some blood and bone into the potting mix when the container was 3/4 full.
I had tried a whole variety of different things in the tins, but on the internet, people tend to stick to herbs. Obviously some of my experiments are not really good for the plants. I've tried a few things!
This was my first experiment with zucchini. As you can see the zucchini did well for a bit, but then soon it began to look rather sickly. It had plenty of water, and I put it on the ground in case roots wanted to dig into the soil to get more space. Next time I'll put them into a big pot!
Here is the base of a celery that I planted in one of these formula pots and it began to grow! I"m not sure how big it will get or whether I will get any usable celery from it, but it was a fun experiment. In the background is curly leaf parsley.
I also had one crop of coriander which I have already harvested. Gotta grab them before they bolt to seed though!
I had seen other people recycling their formula tins, and painting them first so they weren't so ugly to look at.
Onions are the other thing that I had planted to see if I could grow and they did sprout, but did not do well after that. I read that they need a lot of nitrogen, so I may have to fertilize a little more frequently!
It's solidly into Autumn now so I still have time to plant and get a crop before winter. I did make a raised bed in the middle of the chook area, but I wasn't sure what I could put in it that the chickens won't scratch or eat. I found this list on poultrykeeper.com:
Here's hoping! It's weighing day tomorrow, so I hope the chickens have put on some weight!
My mother told me that her sister (my aunt) would get old tins and use them as planters. Her whole garden was filled with them, so I thought I'd give it a try.
First you have to drill drainage holes in the bottom. I didn't have a drill at the time but I used a hammer and nail to make holes. But now we have a drill and I drill the holes.
Then I put a small layer of dry leaves and some shredded newspaper at the bottom, so that I wouldn't have so much dirt falling out the holes.
I filled it up with potting mix and depending on whether I had any worm castings, I'd add that when the container was about 3/4 full. Otherwise I'd mix in some blood and bone into the potting mix when the container was 3/4 full.
I had tried a whole variety of different things in the tins, but on the internet, people tend to stick to herbs. Obviously some of my experiments are not really good for the plants. I've tried a few things!
This was my first experiment with zucchini. As you can see the zucchini did well for a bit, but then soon it began to look rather sickly. It had plenty of water, and I put it on the ground in case roots wanted to dig into the soil to get more space. Next time I'll put them into a big pot!
These are dwarf beans on the left, and on the bottom right are some Thai Basil. The top right one had one rainbow chard seed, which is actually multi-germed and produce a few seedlings from each "seed."
Here is the base of a celery that I planted in one of these formula pots and it began to grow! I"m not sure how big it will get or whether I will get any usable celery from it, but it was a fun experiment. In the background is curly leaf parsley.
I also had one crop of coriander which I have already harvested. Gotta grab them before they bolt to seed though!
I had seen other people recycling their formula tins, and painting them first so they weren't so ugly to look at.
It's solidly into Autumn now so I still have time to plant and get a crop before winter. I did make a raised bed in the middle of the chook area, but I wasn't sure what I could put in it that the chickens won't scratch or eat. I found this list on poultrykeeper.com:
- Garlic, Onions and Leeks
- Potatoes
- Squashes
- Legumes
- Chives, Mint, Rosemary, Tarragon and Sage
- Rhubarb (they will occasionally eat the young leaves but don’t seem to get ill)
- Climbing beans once established
- Currant Bushes (established and without fruit)
- Asparagus (once in leaf)
- Lavender
Here's hoping! It's weighing day tomorrow, so I hope the chickens have put on some weight!
Saturday, 12 March 2016
Worm castings - How to Use it and Harvest it
My worm farm is sitting there full of worm castings and I had no idea how to get it out without getting handfuls of worms too! I didn't want to lose all my worms, and they had done such a great job, I thought I'd better do some internet research about it.
Some people suggest an isolation method when you use a single bin system (like I do) where you put all the food on one side and all the worms will go across to that side, leaving the other side free to harvest your castings. This pic was from Vermiculture Blog.
At the moment this is my worm bin:
So I could try the isolation method. However, I won't be able to get the eggs or the younger worms, and I'd lose all of them into my garden. And it takes WEEKS to do that.
Another method is to use the hessian and pile the castings on top of it (and a container beneath). The worms will bury away from the light and the castings will remain. Another method where I would lose the eggs, but at least I could get a good load of castings and it would be quick.
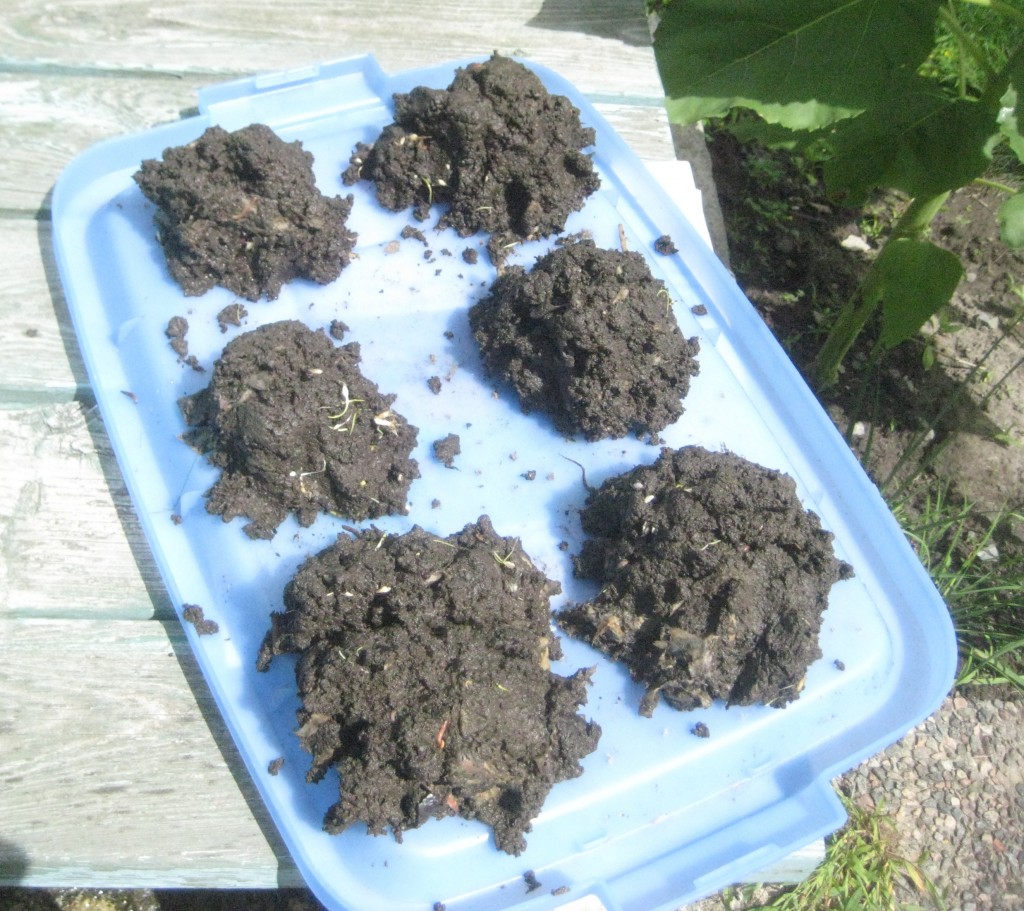
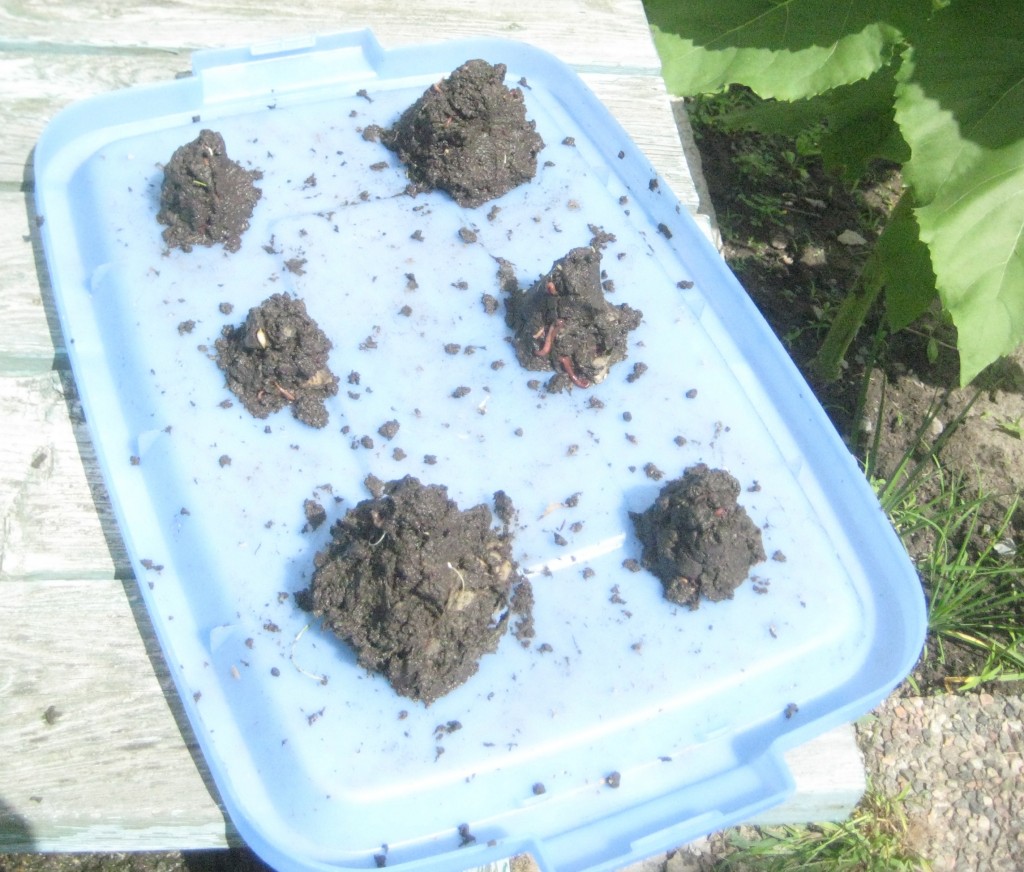
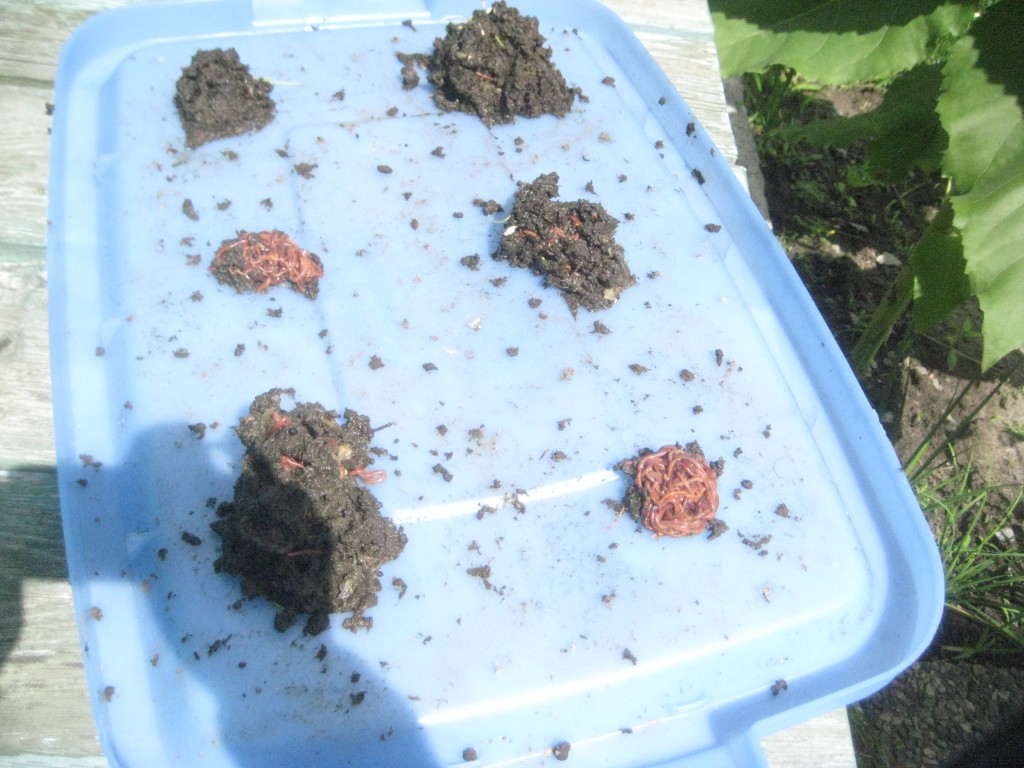
A variation on the hessian filter is to make cone shaped piles and keep shaving off the outside of the pile as the worms dig into the pile. This way you could save a few more eggs. I read about it (and scabbed these pics) from here.
The last method is the empty it all out and sort through it with your hands method. As long as you don't mind getting dirty and sorting through all the castings by hand and picking out the worms. I think it's a bit long though.
I just need some time on the weekend and I will be able to get some castings so I can work with them for my plants. For seeds I am supposed to put the seeds on top of it and then cover and then work the casts into the top soil once a month.
For seedlings you are supposed to put the roots onto the castings and then cover them. Or you can make a mix of 1/4 castings, 1/4 peat moss, 1/4 leaf/hay litter/ 1/4 sand or garden soil (for drainage).
I'm looking forward to finally using some castings. I'm trying to make a second worm farm, so maybe I'll be able to get a little more usage out of my worms! It's hard enough now trying to find enough scraps for the worms AND the compost AND the chickens.
Some people suggest an isolation method when you use a single bin system (like I do) where you put all the food on one side and all the worms will go across to that side, leaving the other side free to harvest your castings. This pic was from Vermiculture Blog.
At the moment this is my worm bin:
So I could try the isolation method. However, I won't be able to get the eggs or the younger worms, and I'd lose all of them into my garden. And it takes WEEKS to do that.
Another method is to use the hessian and pile the castings on top of it (and a container beneath). The worms will bury away from the light and the castings will remain. Another method where I would lose the eggs, but at least I could get a good load of castings and it would be quick.
A variation on the hessian filter is to make cone shaped piles and keep shaving off the outside of the pile as the worms dig into the pile. This way you could save a few more eggs. I read about it (and scabbed these pics) from here.
The last method is the empty it all out and sort through it with your hands method. As long as you don't mind getting dirty and sorting through all the castings by hand and picking out the worms. I think it's a bit long though.
I just need some time on the weekend and I will be able to get some castings so I can work with them for my plants. For seeds I am supposed to put the seeds on top of it and then cover and then work the casts into the top soil once a month.
For seedlings you are supposed to put the roots onto the castings and then cover them. Or you can make a mix of 1/4 castings, 1/4 peat moss, 1/4 leaf/hay litter/ 1/4 sand or garden soil (for drainage).
I'm looking forward to finally using some castings. I'm trying to make a second worm farm, so maybe I'll be able to get a little more usage out of my worms! It's hard enough now trying to find enough scraps for the worms AND the compost AND the chickens.
Tuesday, 29 December 2015
Worms, Compost and now Chickens!
Since I got excited about gardening and growing vegetables, I decided to try and start a worm farm. Hubby kept having these large styrofoam boxes being delivered to the practice and my mum told me I could make a worm farm out of them. So I decided to give it a try.
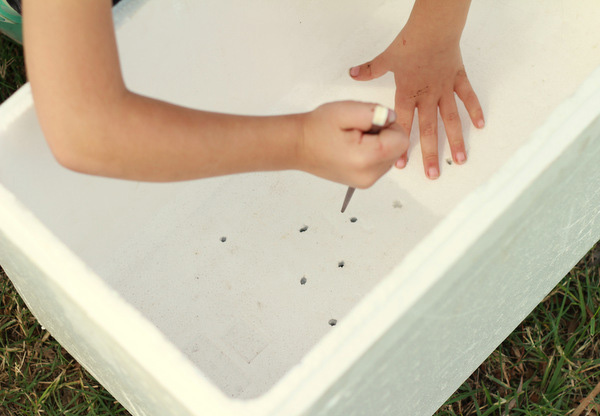
Unfortunately I had only one big styrofoam box and two little boxes. So I started with the big box and poked some drainage holes in the bottom. It would have been nice if I could collect this "worm wee" I read so much about, but I only had one box. The kids were also quite excited about the whole "pet worm" thing.
I did lots of reading and they said to put lots of "carbon" into the box. So I shredded lots of corrugated cardboard and paper and lined the bottom with a few pieces of newspaper so the worms didn't go out the holes as easily. Then I bought a box of worms from Bunnings and away they went. However, we made more fruit peel than they could eat, so I decided to top up with another box of worms and see how that goes. I've been watching it carefully to make sure it's not too dry, and also to make sure food isn't going anaerobic in there. There are a few other bugs in there breaking down the food too, and I every morning we open the lid to see if we can see any worms eating the peelings and other scraps that we left there. One website said that I should bury the food not leave it on top to help control the smell and I might do that for the second worm farm that I wanted to put in the house in square styrofoam boxes.
Then I decided I wanted to keep chickens. I'd been thinking about chickens for a while now, and I didn't have anywhere to put them, except in this area of the backyard that had lots of trees growing out of control in it. I've since cut down those trees, and there is a good space there for putting a coop, but we have the water tank collection thing there. However, I think we can cover it so the chooks don't poop on it, but I've finally gone ahead and bought a coop to put there from My Chicken Coop.
Thinking of starting with 2 Isa Brown hens, and I hope they're friendly so the kids can pick them up and have them treated like real pets. Also, looking forward to feeding them our scraps! I have resigned myself to being the person who cleans and looks after them (adding more time to my chores), but I figured I can at least use their poo on the garden.
Which brings me to the last thing, I finally bought a compost bin. After umming and ahhing about what to get, I bought an Aerobin 400, which seems to be a nice lazy composting bin that would work well for me. I would like to put the excess chicken poo in there and bedding (thinking of using hemp bedding rather than straw). I was doing a lot of reading about successful compost bins and it seems that having the right combination of nitrogen and carbon contents is the key. If you put too much food stuff in there it goes foul and stinky. And it has to be moist and warm too, much like the worm farm. I won't set it up until the chicken coop goes in, because I need some nice solid ground to put it on (like pavers or bricks) and I would like it near the chicken coop. I like how this person has set it up on a raised area.
But the vegies are doing well - the bok choy is growing wild on the tanbark because I threw the old seed pods there after I'd done a big seed harvest and they started growing so I thought, free food! So I've been looking after them, fertilizing and watering them, and even putting out slug and snail bait, and they have been growing nicely and should be right to have some leaves harvested in the next week or two.
I've also tried something my mother was telling me about. Her sister, my aunt, is the ultimate in recycling, and keeps chickens and grows her own vegetables. She collects large tins from her neighbours, punches holes in the bottom for drainage, puts compostable stuff in the bottom 5-10cm of the tin, chucks in some chicken poo and then potting mix on top and then plants vegetables in them and plonks them on the soil. She has containers growing vegies EVERYWHERE, and they're very successful! My mother is a very keen gardener with a huge vegetable garden and takes great pride in her vegies but even she was impressed with her sister's work. My aunt gives eggs and vegies to her neighbours and in return they bring her their kitchen scraps and old tins and she feeds the chooks and makes more pots. So I decided to try that with my sister's empty baby milk powder tins, and have got some zucchini growing in one of them. It will be a bit of an experiment for me!
So currently I have dwarf beans, bok choy, carrots, spring onions, and cucumbers growing. I have just sown some thai basil, lettuce and zucchini and there are some wild spinach that have obviously grown from my failed earlier attempt at spinach (which bolted to seed because it was just too warm here). My poor chili plants have been resuscitated from the brink of death, and my Kaffir lime is growing all over the place (but never flowers or fruits). I have one basil plant that survived the slugs but I really should plant more if I want to get anything useful out of it!
I'm quite enamoured with my garden at the moment, having never thought I would be much of a green thumb, but I find it fun and the kids love to go outside and help water the plants and pick vegies. I bet they'll be even more excited to get eggs every morning!
Unfortunately I had only one big styrofoam box and two little boxes. So I started with the big box and poked some drainage holes in the bottom. It would have been nice if I could collect this "worm wee" I read so much about, but I only had one box. The kids were also quite excited about the whole "pet worm" thing.
| Image from Family Weekend Project: Practical Kids Make a worm farm |
Then I decided I wanted to keep chickens. I'd been thinking about chickens for a while now, and I didn't have anywhere to put them, except in this area of the backyard that had lots of trees growing out of control in it. I've since cut down those trees, and there is a good space there for putting a coop, but we have the water tank collection thing there. However, I think we can cover it so the chooks don't poop on it, but I've finally gone ahead and bought a coop to put there from My Chicken Coop.
Thinking of starting with 2 Isa Brown hens, and I hope they're friendly so the kids can pick them up and have them treated like real pets. Also, looking forward to feeding them our scraps! I have resigned myself to being the person who cleans and looks after them (adding more time to my chores), but I figured I can at least use their poo on the garden.
Which brings me to the last thing, I finally bought a compost bin. After umming and ahhing about what to get, I bought an Aerobin 400, which seems to be a nice lazy composting bin that would work well for me. I would like to put the excess chicken poo in there and bedding (thinking of using hemp bedding rather than straw). I was doing a lot of reading about successful compost bins and it seems that having the right combination of nitrogen and carbon contents is the key. If you put too much food stuff in there it goes foul and stinky. And it has to be moist and warm too, much like the worm farm. I won't set it up until the chicken coop goes in, because I need some nice solid ground to put it on (like pavers or bricks) and I would like it near the chicken coop. I like how this person has set it up on a raised area.
But the vegies are doing well - the bok choy is growing wild on the tanbark because I threw the old seed pods there after I'd done a big seed harvest and they started growing so I thought, free food! So I've been looking after them, fertilizing and watering them, and even putting out slug and snail bait, and they have been growing nicely and should be right to have some leaves harvested in the next week or two.
I've also tried something my mother was telling me about. Her sister, my aunt, is the ultimate in recycling, and keeps chickens and grows her own vegetables. She collects large tins from her neighbours, punches holes in the bottom for drainage, puts compostable stuff in the bottom 5-10cm of the tin, chucks in some chicken poo and then potting mix on top and then plants vegetables in them and plonks them on the soil. She has containers growing vegies EVERYWHERE, and they're very successful! My mother is a very keen gardener with a huge vegetable garden and takes great pride in her vegies but even she was impressed with her sister's work. My aunt gives eggs and vegies to her neighbours and in return they bring her their kitchen scraps and old tins and she feeds the chooks and makes more pots. So I decided to try that with my sister's empty baby milk powder tins, and have got some zucchini growing in one of them. It will be a bit of an experiment for me!
So currently I have dwarf beans, bok choy, carrots, spring onions, and cucumbers growing. I have just sown some thai basil, lettuce and zucchini and there are some wild spinach that have obviously grown from my failed earlier attempt at spinach (which bolted to seed because it was just too warm here). My poor chili plants have been resuscitated from the brink of death, and my Kaffir lime is growing all over the place (but never flowers or fruits). I have one basil plant that survived the slugs but I really should plant more if I want to get anything useful out of it!
I'm quite enamoured with my garden at the moment, having never thought I would be much of a green thumb, but I find it fun and the kids love to go outside and help water the plants and pick vegies. I bet they'll be even more excited to get eggs every morning!
Wednesday, 12 August 2015
Kids gardening - Vegepod
I haven't had much luck growing good vegies. This year has been particularly pathetic, and I could even get my basil to grow (though a lack of watering and late planting into the ground may have had a lot to do with that). Last year's poor beans had been plagued by bugs, my snow peas this year met an early demise from the extreme temperatures, and I only ever got one okra from my plants. The cucumbers from a few years ago were the best crop I had. and a colleague of mine suggested a Vegepod.
From the website:
Here they are at about 2 weeks. You can see my little beer trap on the right there.
After a month they were getting nice and almost ready to eat! And 2 weeks after that I decided to plant some spinach and lettuces between the carrots and the bok choy. I had picked a couple of the outer leaves for the kids to eat and they seemed to be excited to be eating home grown vegies. I planted a few seeds of coriander next to the carrots for fun.
The lettuce was quite slow to germinate (about 2 weeks) but the spinach popped up within a week. The lettuce is next to the carrots and the spinach next to the Bok Choy. By now there were plenty of leaves to harvest and we were having a regular meal at least once a week, sometimes twice.
And this is them last week (first week of August) . I had put some Blood and Bone Fertilizer to try and boost my lettuces and it seemed to do the trick. Unfortunately the carrots also seem to have taken to sprouting more leaves because of the fertilizer which is not ideal because I want them to grow more root (carrot).
This week I noticed that the Bok Choy is starting to flower. I was going to let one of them seed and cut the rest of the flowers back so I can keep harvesting leaves. Maybe I can plant some more Bok Choy to keep the supply going!
The best thing is that the kids love to come outside to water the plants and pick the vegies, and they are also very keen to eat them. They are so enthusiastic about eating the vegetables that are grown at home and cared for by them that I would highly recommend vegie growing as an incentive for kids to eat their vegetables!
Carrots aren't ready to harvest yet - and it was hard for me to figure out when they would be ready, but apparently they are ready when you see the orange tops pushing out of the ground. Should take 90 days or so, I've heard. I had a little dig to see if any root was forming but nothing yet....
...they provide superior growth-rates due to the complete growing system. Unlike traditional raised garden beds the Vegepods give you complete control over the soil which means any nutrients you add are utilised by your plants only. The self-watering reservoir holds up to 64 litres providing all the moisture your plants require – from below!
I was skeptical, it sounded too good to be true. Was it really that easy? I read a couple of reviews - one on Vegie Smugglers and another on Going Grey and Slightly Green - and both said great things. Here is a pic of what Vegie Smugglers grew in 5 weeks.The unique greenhouse cover provides a micro-climate that promotes rapid growth. The cover has a mist-spray watering system and the hinged cover provides effortless access to all plants – even mature ones. Tired of the possums and wildlife eating your crops before you do? The covers protect your plants from animals, pests and bugs and damaging weather.
Inspiring right? So I went and bought a small one from the local pet and garden store, and put it together. The cover is actually quite hard to assemble and trying to get the plastic on made me crack the connecting joins so I hope they don't fall apart after lots of exposure to the sun. My set was also missing the clips to connect the cover into a flip top, so I emailed Vegepod and Matt said he would send me out some clips.
I set it up in the backyard on the grass, and I put some Bok Choy on the right and planted some carrots on the left and here they are.
A few weeks later they were looking nice and fat but unfortunately caterpillars and slugs were attacking them! There is enough gap underneath the cover to allow the ratbag slugs in, so they have been climbing up my container in droves.
The carrots were coming up, and were so far safe from the slugs, but the slugs were coming in force to the bok choy side and so I had to put baits out to get rid of them. I also did a beer trap which wasn't very effective because I put it on the wrong side but I moved it and caught 2 slugs as well as 6 others that were crawling all over the place. I had also put baits out so perhaps the slugs were disoriented because of the bait.
Here they are at about 2 weeks. You can see my little beer trap on the right there.
After a month they were getting nice and almost ready to eat! And 2 weeks after that I decided to plant some spinach and lettuces between the carrots and the bok choy. I had picked a couple of the outer leaves for the kids to eat and they seemed to be excited to be eating home grown vegies. I planted a few seeds of coriander next to the carrots for fun.
The lettuce was quite slow to germinate (about 2 weeks) but the spinach popped up within a week. The lettuce is next to the carrots and the spinach next to the Bok Choy. By now there were plenty of leaves to harvest and we were having a regular meal at least once a week, sometimes twice.
And this is them last week (first week of August) . I had put some Blood and Bone Fertilizer to try and boost my lettuces and it seemed to do the trick. Unfortunately the carrots also seem to have taken to sprouting more leaves because of the fertilizer which is not ideal because I want them to grow more root (carrot).
This week I noticed that the Bok Choy is starting to flower. I was going to let one of them seed and cut the rest of the flowers back so I can keep harvesting leaves. Maybe I can plant some more Bok Choy to keep the supply going!
The best thing is that the kids love to come outside to water the plants and pick the vegies, and they are also very keen to eat them. They are so enthusiastic about eating the vegetables that are grown at home and cared for by them that I would highly recommend vegie growing as an incentive for kids to eat their vegetables!
Carrots aren't ready to harvest yet - and it was hard for me to figure out when they would be ready, but apparently they are ready when you see the orange tops pushing out of the ground. Should take 90 days or so, I've heard. I had a little dig to see if any root was forming but nothing yet....
Subscribe to:
Posts (Atom)